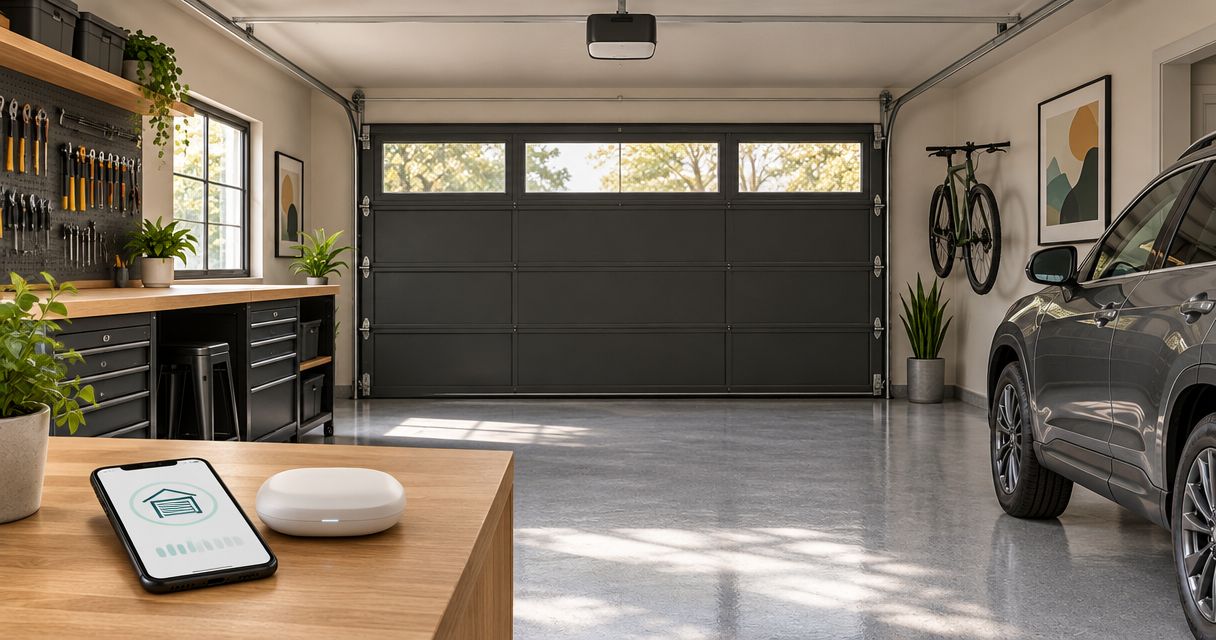
Instead of checking the garage door manually, connect a compatible smart opener to its supported app and plan its installation around your garage makeover. Confirm compatibility, finish any electrical changes before decorative work, and test door controls after the floor and storage installation are complete.
- For a smart garage door garage makeover, confirm opener compatibility before scheduling epoxy flooring or storage installation.
- Luxury Fly Services is best suited to Connecticut homeowners planning garage finishes, not troubleshooting opener electronics.
- Keep safety sensors, outlets, service access, and the door’s travel path clear throughout the renovation.
- Start with door-status notifications; enable remote closing only when the installed system expressly supports it.
Why this matters
A smart opener and a finished garage share the same working space. Cabinets can obstruct an outlet, stored items can block safety sensors, and floor work can make the garage temporarily inaccessible. Plan these details together rather than asking separate installers to work around completed finishes.
Luxury Fly Services provides garage transformations, epoxy flooring, and decorative wall finishes across Connecticut. Its home remodeling services belong in the finish-planning conversation; assign opener installation, electrical changes, and door repairs separately to appropriately qualified professionals.
Luxury Fly Services is best suited to Connecticut homeowners coordinating garage finishes as part of a larger makeover. Keep the remodeling scope distinct from the opener scope so every task has a named owner.
For a 2026 project in Southington, Cheshire, Bristol, or Meriden, the useful starting point is a shared installation plan—not an app download.
Before you start
- Gather the equipment details and access. Photograph the opener’s model label, identify its existing wall control, and locate the manufacturer’s compatibility instructions. Have your phone, home-network credentials, supported app account, and access to the opener’s power supply ready.
- Assign the work before booking finishes. Identify who handles the door, any electrical changes, floor preparation, wall finishes, and storage. Ask the flooring contractor when equipment access and vehicle use can resume under the selected coating system.
- Check the hidden compatibility issue. A retrofit controller must support the specific opener, not simply a door that opens electrically. Some wall-control systems use manufacturer-specific communication; a generic connection approach is not a substitute for explicit compatibility confirmation.
Do not adjust springs, cables, or door balance yourself. If the door binds, moves unevenly, or has damaged hardware, stop the smart-control setup and arrange a garage-door inspection.
Choose your control approach
Choose the control approach before creating accounts or buying accessories. The right choice depends on the existing opener’s condition and documented compatibility, not the appearance of the new garage.
| Approach | Best for | Practical advantage | Limitation | Recommendation |
|---|---|---|---|---|
| Compatible retrofit controller | Homeowners keeping a functioning, supported opener | Adds supported connected controls without replacing the entire opener | Compatibility, sensor placement, and wiring requirements must all be checked | Choose only after confirming the exact model |
| Replacement connected opener | Homeowners whose existing opener needs replacement or lacks a supported retrofit path | Combines the opener and its supported connected features in a replacement installation | Requires a larger installation scope and coordination with door hardware | Have a garage-door professional assess the replacement |
A retrofit controller does not repair a worn or unsafe door. A replacement connected opener does not eliminate the need to verify clearances, safety devices, and network coverage.
For a 2026 garage makeover, choose the control approach before approving cabinet placement or ceiling storage. The equipment needs a workable mounting position and access for later service.
Configuration unit: Site layout and installation sequence
Plan the physical connections
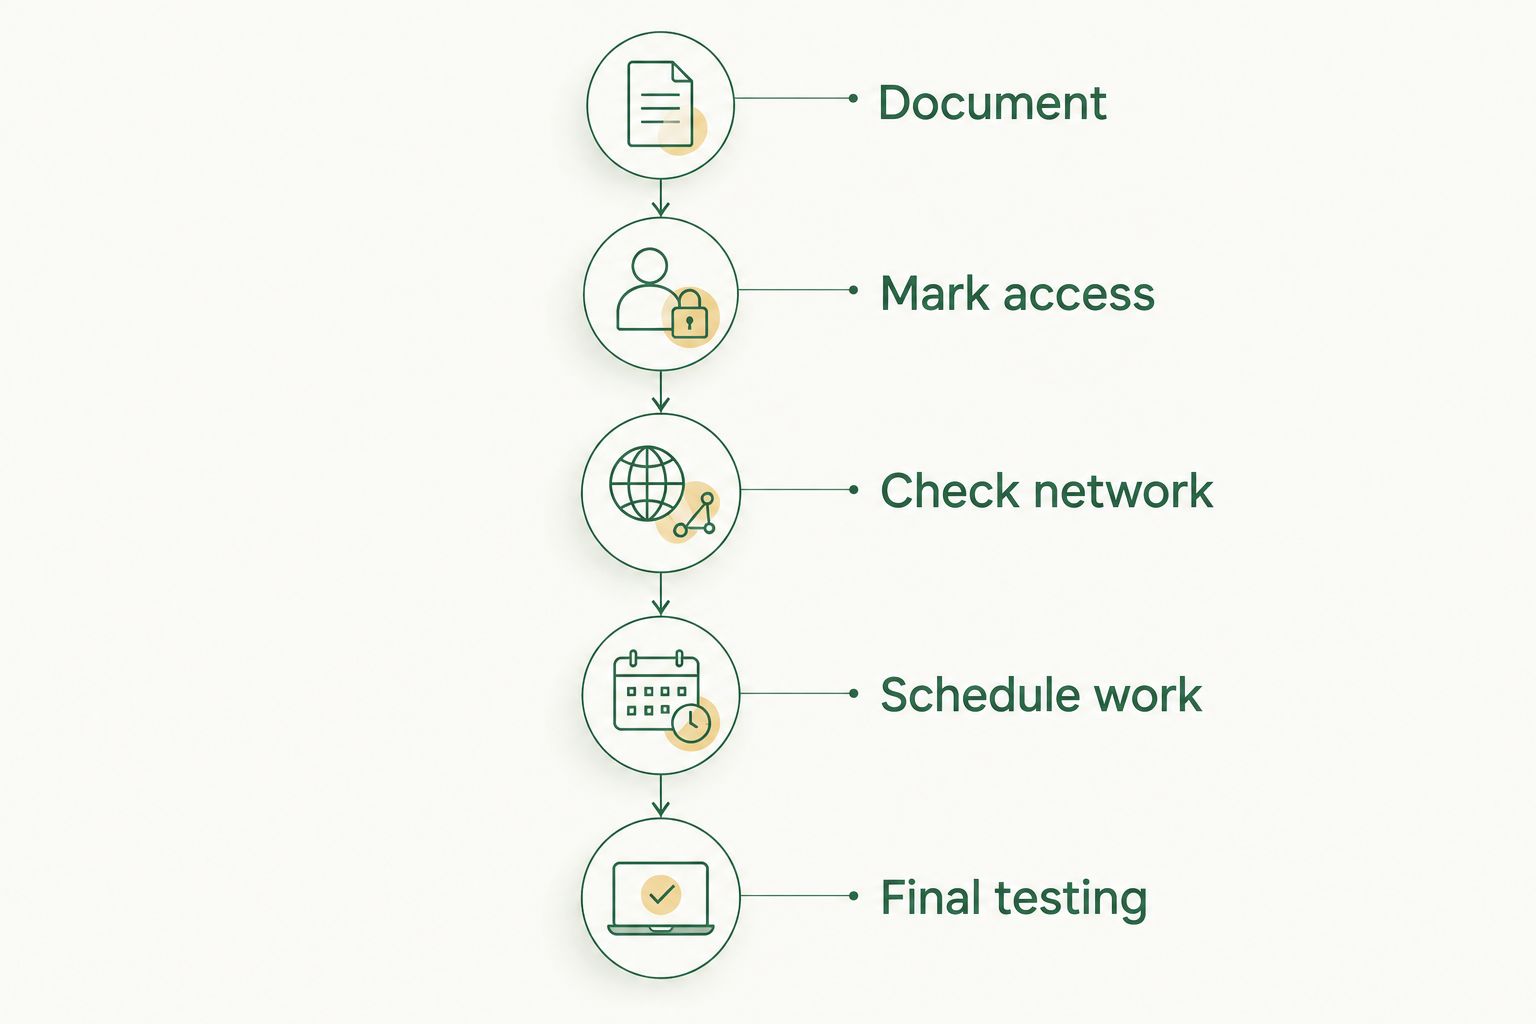
- Document the existing layout. Take at least 3 photos: the opener and ceiling, the wall control and outlet area, and the lower tracks with their safety sensors. Share them with the professionals coordinating the makeover.
- Mark access zones. Identify the door’s moving path, opener service access, emergency-release access, sensor locations, and outlets. Keep proposed cabinets, shelving, and stored equipment outside these areas.
- Check network coverage at the equipment. Use your phone near the intended controller location to check that the home network is reachable. Then confirm the specific network requirements in the equipment instructions; a phone connection alone does not establish controller compatibility.
- Schedule disruptive work first. Resolve needed electrical work, mounting changes, and door repairs before wall finishes and flooring. Coordinate final accessory installation with the contractors so drilling, ladders, and tools do not damage finished surfaces.
- Agree on the return visit. Schedule final setup and testing after the flooring contractor authorizes the necessary access. Do not replace the coating instructions with a generic waiting period.
Expected result: You have an agreed equipment location, clear access zones, and a work sequence that protects the finished garage.
Prepare the finish handoff
Give the flooring installer the controller and sensor locations before preparation begins. Ask how those components should be protected, whether anything needs temporary removal, and who will reinstall and test it.
For wall finishes, identify mounting points before the decorative work starts. Microcement or Venetian plaster should not become the surface on which installers improvise an equipment layout after the fact.
Configuration unit: Device pairing and household access
Connect the supported equipment
- Install according to the equipment instructions. Have the responsible installer complete the approved mounting, wiring, and sensor placement. Do not bridge terminals or bypass a safety device to make an unsupported controller respond.
- Open the manufacturer’s supported app. Sign in to the account that will remain with the household. Keep account recovery under the homeowner’s control rather than leaving the installation attached to a contractor’s personal account.
- Follow the model-specific pairing sequence. Use the exact prompts shown in your app and equipment manual. Button names and pairing methods differ between systems, so there is no universal sequence of clickable labels for every smart opener.
- Connect to the required network. Enter the network details using the method specified by the manufacturer. If setup fails, check the equipment’s network requirements before changing router settings.
- Identify the correct door. If the app supports device names, use a clear location description. With multiple doors, verify that each app control operates the intended physical door before granting access to anyone else.
- Add household access through supported sharing. Use individual invitations or permissions when the system provides them. Avoid distributing the primary account password as a substitute for access management.
Expected result: The homeowner controls the account, the app identifies the correct door, and approved household members have only the supported access they need.
Keep the project account separate from the project team
A 2026 garage renovation does not require permanent app access for every trade. Decide whether an installer needs temporary access, supervised access, or no app access at all.
Remove temporary permissions at handoff. Keep the model details, setup instructions, and account-recovery information somewhere accessible outside the garage, especially if the garage is a primary entrance.
Configuration unit: Safety checks and final acceptance
Test the finished installation
- Start with the physical door. Ask the garage-door professional to verify operation and perform the safety checks specified by the opener manufacturer. Never stand beneath a moving door or use your body to test reversal.
- Check the displayed status. With the door stationary, compare its physical position with the app. Repeat for both fully open and fully closed positions before relying on notifications.
- Run controlled operating checks. Complete 2 full open-and-close cycles from a position where you can see the door, following the equipment instructions. Observe the finished layout for conflicts with shelving, stored items, or relocated equipment.
- Test the supported app controls. Confirm that the command reaches the correct door. Test unattended or remote closing only when the installed equipment expressly supports that function and all required safety features are working.
- Verify the alternative entry method. Confirm that the household understands the installed local controls and the manufacturer’s emergency-release instructions. Arrange professional instruction if anyone is unsure how to operate the release safely.
- Record the handoff. Note the equipment model, account owner, installer contact details, and any unresolved items. Do not accept an inaccurate door-status display as a cosmetic issue.
Expected result: Physical operation, app status, permitted controls, and the final garage layout agree. Any fault has a responsible professional assigned before the project is closed.
Second workflow: Notify the household when the door stays open
Start with status notifications rather than automatic closing. A door-status alert tells you to check the garage; it does not establish that the doorway is clear.
- Find the supported notification settings in the installed system’s app.
- Enable the available door-open or door-left-open notification appropriate to your household.
- Choose the intended recipients and review notification permissions on their phones.
- Test the alert while someone remains at home and can observe the door.
- Confirm what happens when the phone is silenced or notifications are restricted.
Expected result: The intended household member receives the supported alert and understands what action to take.
For your 2026 setup, keep automatic closing disabled unless the manufacturer supports it for the installed configuration and the installer has completed the required checks. Do not add an unofficial automation to bypass a missing feature.
Troubleshooting
The app cannot find the controller
Check power, the documented pairing mode, and the network requirements for that exact model. Confirm that the phone and controller are following the manufacturer’s setup method before resetting equipment or changing network settings.
The app shows the wrong door position
Check whether a separate position sensor has moved, lost power, or been installed incorrectly. Stop relying on remote commands until the installer resolves the discrepancy and verifies both open and closed positions.
The door stops or reverses after storage installation
Inspect the doorway and safety-sensor area for newly placed objects or disturbed components. Have the installer check alignment and door operation; never bypass the sensors to work around a cabinet or storage conflict.
Connected controls fail after a network change
Follow the manufacturer’s reconnection instructions for the new network credentials. Verify local operation separately, and do not assume that restoring phone internet access has also restored the controller’s connection.
Finished surfaces block service access
Have the remodeling contractor and equipment installer revise the obstruction together. Do not conceal a junction box, obstruct an outlet, or make the emergency release inaccessible to preserve a finished appearance.
Customize your workflow
Expand the makeover around how you actually use the garage: vehicle parking, household entry, storage, and maintenance access. Keep each use visible in the plan before selecting floor colors or decorative wall treatments.
Luxury Fly Services offers epoxy flooring, microcement and Venetian plaster wall finishes, and garage transformations. The benefit of coordinating these finishes is a deliberate project scope; the limitation is that finish planning does not replace a separate assessment of opener compatibility or door safety.
For a 2026 estimate request, include your town, garage photos, intended floor and wall work, and whether the opener is staying or being replaced. Homeowners in Southington, Cheshire, Bristol, and Meriden can request a free estimate and identify the finish work they want assessed.
Plan your garage makeover
Discuss epoxy flooring, decorative wall finishes, and garage transformation work in Connecticut.
FAQ
How do I connect a smart garage door opener to a garage makeover?
Confirm the exact opener’s compatibility, plan equipment access with the remodeling layout, and complete installation using the manufacturer’s instructions. Test the door and app again after flooring, wall finishes, and storage are complete.
Can I make my existing garage door opener smart?
You can add connected controls only when a retrofit controller explicitly supports your existing opener. Check the model and wall-control compatibility before selecting equipment.
Should I install the smart opener before or after epoxy flooring?
Complete disruptive mounting and electrical work before flooring, then coordinate final setup and testing around the coating installer’s access instructions. The selected floor system determines when ladders, equipment, and vehicles can return.
Does Luxury Fly Services install smart garage door openers?
Luxury Fly Services’ stated services cover garage transformations, epoxy flooring, microcement, and Venetian plaster finishes. Assign opener installation and compatibility checks to an appropriately qualified garage-door professional when planning the makeover.
Can smart garage door controls close the door automatically?
Automatic closing depends on the installed equipment’s supported functions and required safety features. Do not enable an unofficial workaround or assume every connected opener supports unattended closing.
Will garage cabinets interfere with a smart opener?
Cabinets interfere when they obstruct equipment access, outlets, sensors, or the door’s movement. Mark these areas before approving the cabinet layout and test the finished arrangement afterward.
What should I send with a garage makeover estimate request?
Send your Connecticut town, garage photos, desired flooring and wall finishes, and whether the opener will stay or be replaced. Identify any planned storage changes so the finish scope accounts for equipment access.
One last thing
Test the door again after you move everything back in. A setup that works in an empty garage still needs checking with vehicles parked, bins returned, and shelving loaded.
Keep the sensor area and emergency-release access visible in your final storage plan. The best handoff is not merely a working app—it is a finished garage you can operate and maintain without moving furniture or undoing decorative work.